How to Repair a Garage Door?
A malfunctioning garage door quickly disrupts the daily routine. From broken springs to faulty openers, understanding how to fix garage door issues yourself saves time, money, and frustration—especially the most common and basic ones.
Let’s walk through the clear, actionable steps for repairing the garage door and its opener. No matter if your garage door spring is broken or maybe you have to install a new opener, these tips and steps are perfect to guide you for doing it quickly and safely.
Common Garage Door Problems
Regular wear and tear often cause minor to serious damages to garage doors. It’s essential to identify the real issue and gain clarity before diving into the process of how to repair a garage door. Some of the most common garage door problems are:
Broken Springs
Springs smoothen the opening and closing of garage doors. A broken spring prevents the door from operating properly—making it stuck in one position, neither fully closed nor fully open.
Misaligned Tracks
Bent or misaligned tracks that guide the garage door make it stuck—making it difficult to open or close.
Worn Rollers or Hinges
Worn out rollers or hinges also make the door move jerkily or create loud noises. The garage door may function but absurd jerks and noises feel irritating.
Broken Garage Door Opener
Normally, it is caused by an electrical issue or a broken mechanical component that stops the opener from functioning properly. A non-responsive garage door opener is a common issue.
How to Repair a Garage Door? Let’s DIY
If the garage door is broken or isn’t functioning correctly, follow these simple steps to troubleshoot and fix the garage door—making it an easy DIY chore which might seem like a technical/professional job. These are tested methods which 100s of homeowners commonly face, so they’re designed to be straightforward and easy to follow.
Step 1: Inspect the Door’s Operation
Start by observing how the door moves when you open or close it. Does it move unevenly, get stuck halfway, or make strange noises? This initial inspection helps pinpoint the issue.
- Uneven Movement: This is most likely to be a problem with the springs. Either the garage door spring is broken, out of balance, or misplaced—not to worry as it can be caused due to rough usage.
- No Movement: If the door isn’t responding at all, the issue could be with the opener or the springs.
- Excessive Noise: Irregular noise is another common sign of worn-out rollers or lack of lubrication in that section.
Identify the major issues with a careful inspection and plan your garage door repair according to the condition of broken components.
Step 2: Examine the Springs
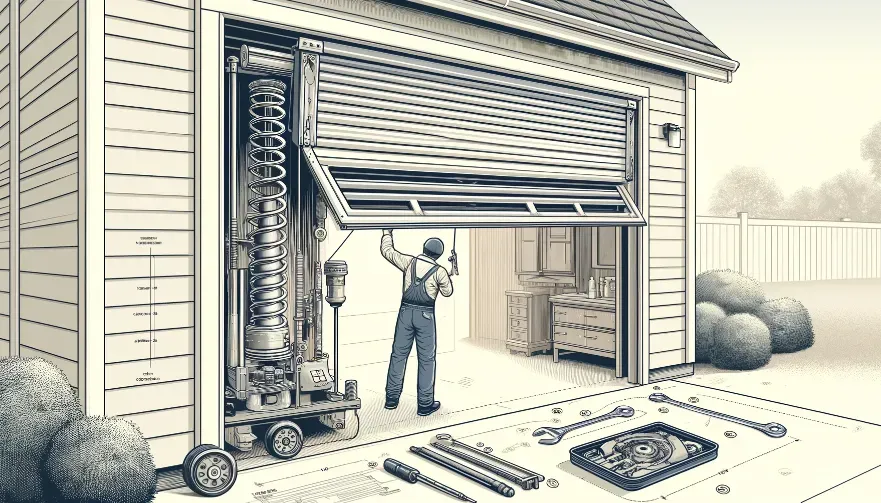
Springs bear the majority of the load of the door and help moving freely. If the spring snaps, the door will be stuck. Residential garage doors use two types of springs for operating. The first type is the torsion spring (located above the door). The second one is an extension spring (located on either side of the door).
Torsion Springs
The torsion spring is broken if there is a popping sound or if the door is sagging. These springs handle immense tension. This tension makes it a little dangerous to replace a torsion spring for a layman. It is necessary to follow the manufacturer’s guide and use the proper tools to replace the garage door spring without professional help.
Extension Springs
These run alongside the door and are more visible. If the spring is snapped or stretched out, your door won’t be able to lift.
For a DIY repair, carefully remove the broken spring by loosening the mounting brackets. Then, take measurements of the old spring and order a replacement from a trusted supplier. Make sure the new spring matches the exact length and weight capacity of the old one.
Step 3: Inspect & Realign the Tracks
Misaligned or dirty tracks are another common issue that can affect your door’s movement. If the door is jerking or getting stuck, the tracks may be the culprit.
Check for Dirt & Debris
Start with the tracks’ inspection for any accumulated debris, dirt, or small obstructions. A clean track is necessary for rollers to move smoothly. Use a damp cloth to wipe down the tracks.
Check for Alignment
The tracks must be parallel to each other with a fine alignment to the door. If they’re misaligned, use a rubber mallet to gently tap the tracks back into place. Be careful not to bend them too much. Also, check the mounting brackets for secure functioning.
Step 4: Examine & Replace Rollers and Hinges
If the door creaks or moves, if it jerks up and down, this tells you that the rollers or hinges are worn out. It is always under stress and wears out with time.
Inspect Rollers
Indications of its wear should also be observed in terms of crack, chip or rust formation. It is recommended to change them as soon as possible if the rollers have been destroyed. Twist off the defective rollers, then take them out, and put new ones in their place.Make sure the new rollers match the size and type of the existing ones.
Check Hinges
Hinges also wear out with time. This causes misalignment of the garage door. If any of the hinges are cracked or bent, get the new ones right away to avoid further damage to the door’s structure.
Lubricate both the rollers and hinges after replacement. Use a silicone-based lubricant for reduced friction and wear in the coming years.
Step 5: Test the Door’s Balance
A door that is not balanced properly will have difficulty moving smoothly, and may even cause damage to the opener or other components. To test the door’s balance:
- Disconnect the opener by pulling the emergency release handle.
- Manually lift the door halfway. It should stay in place without falling or feeling heavy. If it does not, it may indicate an issue with the springs or track alignment.
If the door is unbalanced, adjusting the springs may resolve the problem. However, this can be dangerous for non-professionals due to the tension in the springs, so if you’re unsure, it’s best to call a technician.
Step 6: Lubricate the Moving Parts
Lubrication is one of the simplest and most effective ways of increasing the durability of your garage door. It minimizes wear and tear between the moving parts so that the machine will operate without many problems.
- Apply silicone-based lubricant to all moving parts, including the tracks, springs, rollers, and hinges.
- Avoid using oil-based lubricants like WD-40, as they attract dust and dirt over time, which can cause the tracks and rollers to wear out faster.
When you lubricate the components every 6-12 months you will ensure that your garage door will run as an efficient machine and you will see less need for repairing garage doors frequently.
Step 7: Tighten All Loose Hardware
Over time, the constant movement of the door can cause hardware to loosen. Bolts and screws can come loose, causing instability or rattling.
- Inspect all hardware, including the mounting brackets, bolts, and screws.
- Use a wrench or screwdriver to tighten any loose fasteners.
A stable door will operate more efficiently, and this simple step can often resolve issues like noise and wobbling.
How to Replace or Install a Garage Door Opener?
If your garage door opener is malfunctioning, it might be time to replace it. Replacing an opener is a more involved process, but with careful planning, you can tackle it successfully.
Step 1: Choose the Right Opener
Garage door openers come in different types: chain drive, belt drive, and screw drive. Consider the following when selecting the right opener:
- Chain Drive: These are reliable and cost-effective, but tend to be noisy. Ideal for detached garages.
- Belt Drive: Quieter and smoother than chain drives, these are perfect for garages attached to the home or near living areas.
- Screw Drive: Requires minimal maintenance, but can be noisier than belt drives.
Make sure the opener you choose is compatible with the size and weight of your door.
Step 2: Disconnect the Power
The first thing to do especially if you are going to start the replacement process is to ensure you have dismissed power from the opener. This can be done by disconnecting it or pulling the switch off the breaker usually used to power the garage.
Step 3: Remove the Old Opener
Disconnect the wiring and take the motor unit off first if there is a need to replace the door opener. There are different types of openers used for the garage doors. For each type, it is better to examine the structure and screw placement. Then with the help of screw driver or wrench take the opener off to the ceiling. While fixing the garage door opener, it is important to put extra care as it is one of the most crucial components.
Step 4: Install the New Opener
The first step here is to take a new opener and install it in the system as the manufacturers recommend. Screw the motor on the ceiling, so it is directly above the door. Screw it on mounting brackets for better anchorage.
After that motor has been implemented, place the rail that helps the door to slide. Be sure to install the rail in such a way as it suits the guidelines of the manufacturing company.
Step 5: Connect the Door to the Opener
Once the rail and motor are installed, it’s time to connect the door to the opener’s lifting arm. Ensure the lifting arm is securely attached to the door’s bracket. This connection is critical for smooth and consistent door movement.
Step 6: Install Safety Sensors
Safety sensors are a standard accompaniment in contemporary garage door openers. These sensors help avoid accidents by making the door reverse, if it comes across an object.
Place the sensors approximately 6 inches above the floor and on opposite sides of the door, which each other sensing device should be placed directly across from the other. Ensure that the wiring is connected correctly to the opener.
Step 7: Program the Opener
Program the new opener by setting the travel limits and force settings. Push the door and give the doorknob a twist to see that it has no sticking issues. Depending on the weight and size of your door it might be necessary to fine tune these settings a little.
It is safer to ensure that the safety sensors are working okay by placing an object in front of the door to see whether they will stop the door or not.
Fixing Garage Door with Zero Trouble
Repairing and fixing a garage door doesn’t have to be a tough, complicated process. Even a non-professional can fix the most common garage door issues with the right tools and approach—from broken springs to misaligned tracks and faulty openers, everything is doable. However, always be mindful of safety when dealing with high-tension components like springs.
Regular garage door maintenance eliminated the chances for expensive garage door repairs and replacement. Also, knowing how to fix a garage door makes it supereasy to rectify the problem and fix the garage door without any hassle.
At any point repairing a garage door DIY chore gets out of hand or feels difficult, call GBrothers—your professional garage door repair and maintenance specialist with proven skills and trusted reputation across Lakewood, Colorado.


